3 Solid, Everyday, SUPER QUICK Vegan Breakfast Choices


bed


We all know we should eat breakfast.

You don’t need ME to bang on about why you should eat this first meal of the day.

But I totally get that when you work early, or if you have to get kids to school, it’s easy to get into bad habits like just grabbing a coffee, then snacking on something less than healthy later.

The ideal breakfast solution therefore is something that is super-duper quick to make, hearty enough to fuel us until lunch, and tasty – to give us the incentive to eat breakfast every day.

Luckily, healthy quick vegan brekkies are a no brainer.

Here are three solid, ‘can’t go wrong’ breakfast choices that guarantee a healthful, energy-boosting start to the day. You can either have the same thing every day and just switch it up if you get bored, or have all three on rotation. Either way, any of these breakfasts will see you right.


1. Oats and raisins

IMG_5039

Your raw materials for this are oats (that’s porridge oats or steel-cut oats, NOT jumbo oats, they’re harder to digest), and raisins.

This is enough. This is perfect. If you only have enough time to throw this together, don’t worry, it’s already a superhero breakfast. Add either water (it works, trust me!), soy milk, almond milk or any other dairy alternative.

If you have time, and if you have them on hand, add any or some of the following:

  • 2 tbspns ground flax seeds
  • blueberries
  • raspberries
  • chopped strawberries
  • chopped banana
  • chopped apple
  • goji berries
  • chopped dates
  • chopped almond, brazil, walnuts
  • sunflower/pumpkin/sesame seeds
  • cinnamon

Yes, you could heat up the oats and water and make porridge, but it’s great as it is, and I’m trying to keep it as quick as possible. If it’s easy and quick it’s more likely to stick and become a habit even if you’re an ULTRA busy bee.

You can also sub brown rice for the oats. If you’re having an evening meal that involves brown rice, make some extra, let it cool, cover, and put it in the fridge for breakfast the next day. Top in exactly the same way.


2. Toast with peanut butter and banana

IMG_5086

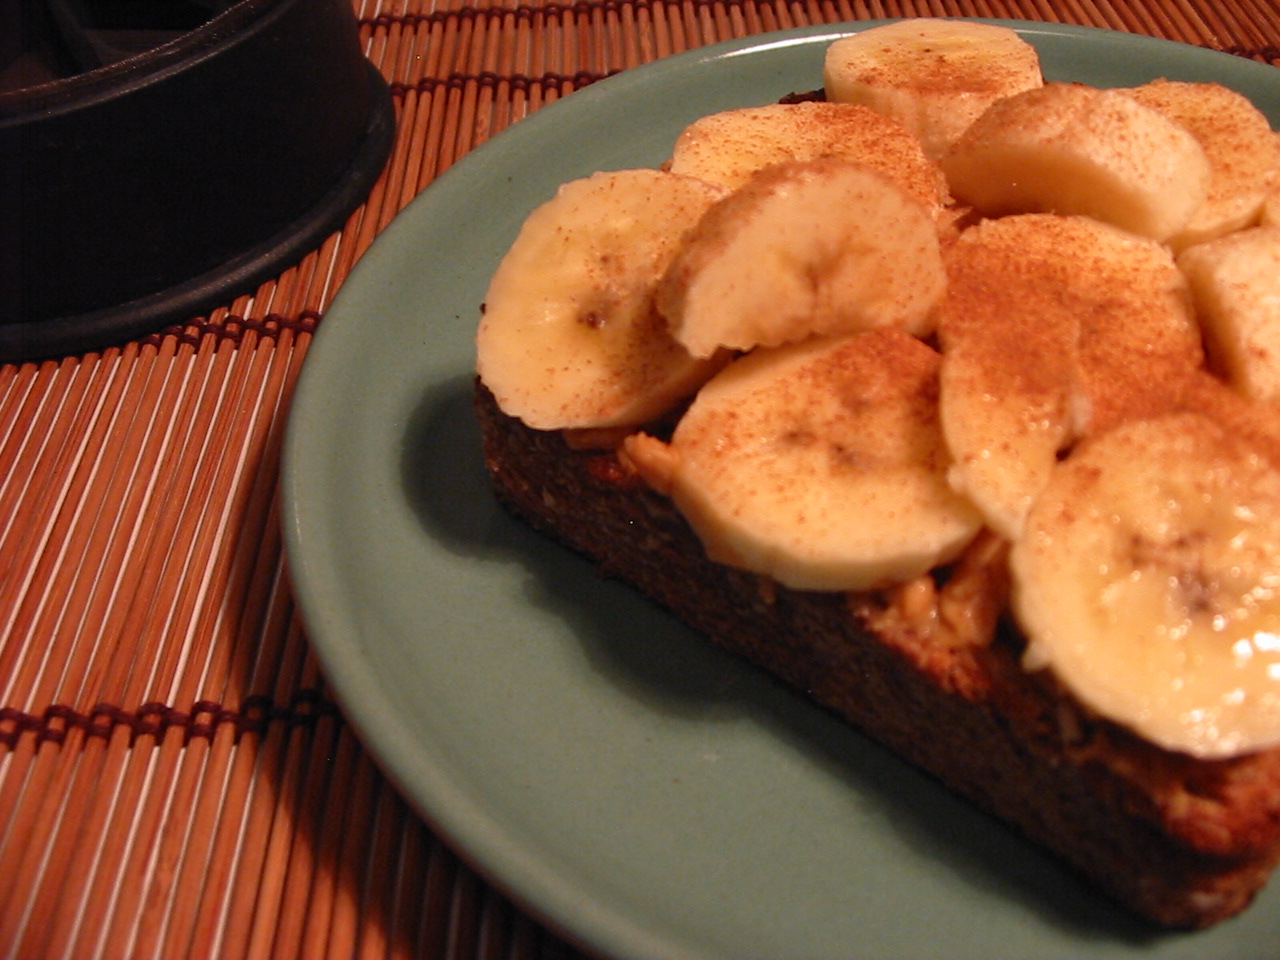
Make sure the toast is wholemeal. Start with a lick of non-dairy spread if you need to, then add peanut butter and top with sliced banana. Add cinnamon if you like.

Yes, of course you could put anything on the toast, but I’m going for maximum nutrient input here, and for the topping that will give you the most energy. Among a whole host of other benefits, bananas will sort out your potassium needs (vital for heart health and maintaining healthy blood pressure levels); and the peanut butter, as well as having a nice array of vitamins and minerals, is also a great protein source. This breakfast is full of fibre, and thus great for keeping the digestive system sweet.


3. ‘Customised’ yoghurt

IMG_5080

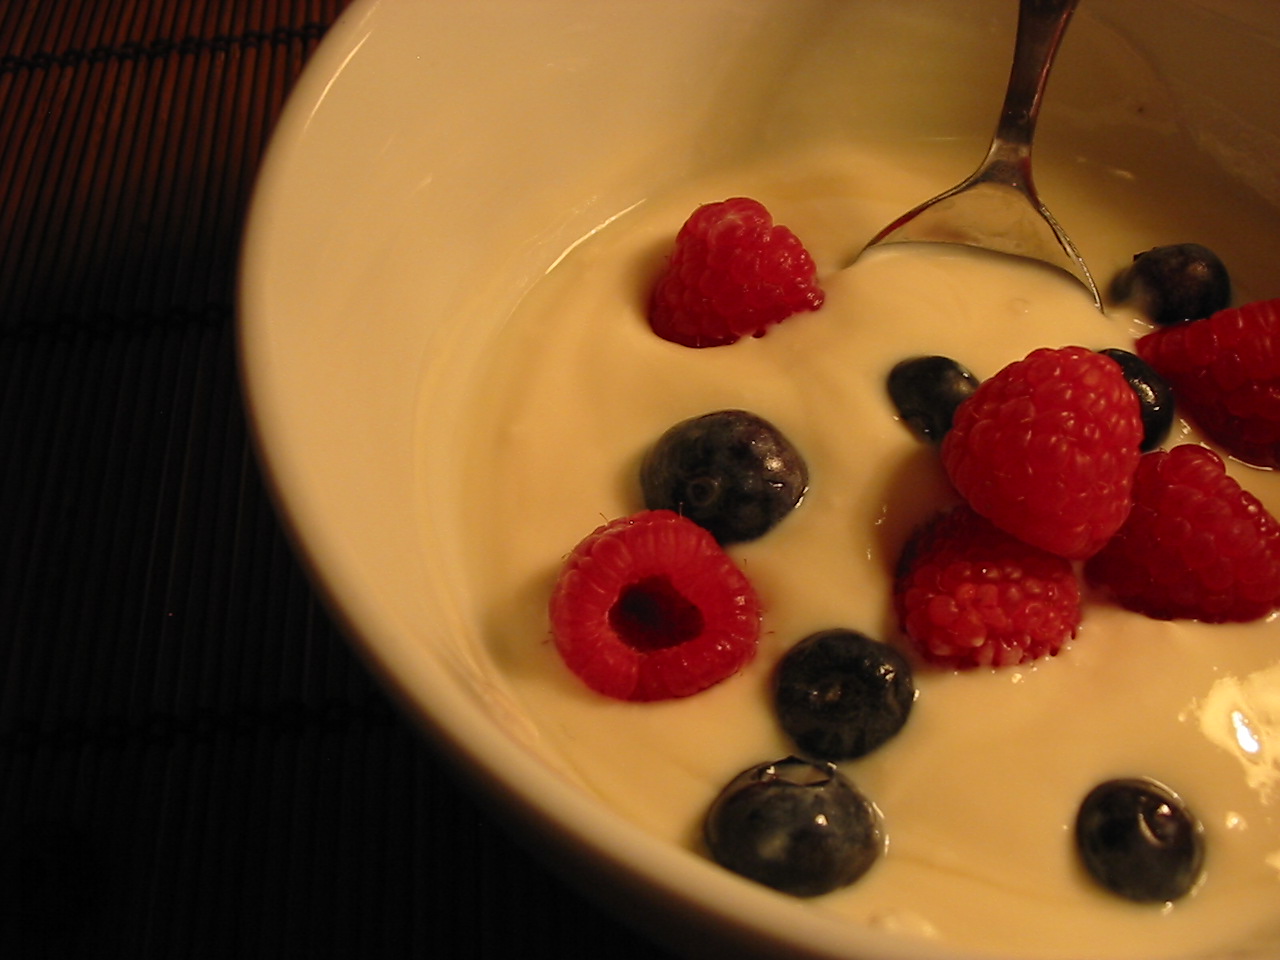
Put a serving of any plain non-dairy yoghurt in a bowl. I use Sojade plain soy yoghurt as it’s sugar free. It’s always better to add your own sweetener so you can use a healthier option than sugar, and so you can judge just exactly how much you need. US peeps, this coconut yoghurt by So Delicious looks great.

Yoghurt will give you an excellent dose of ‘good bacteria’ (probiotics) to start your day. Your gut will thank you.

If you need to sweeten it up a tad, add maple syrup/agave/or brown rice syrup to taste.

Top with any or some of the following:

  • 2 tbspns ground flax seeds
  • blueberries
  • raspberries
  • chopped strawberries
  • chopped banana
  • chopped apple
  • chopped grapes
  • goji berries


There are plenty of fancier vegan breakfast recipes on the web – tofu scramble, breakfast muffins, homemade waffles etc. By all means seek these out for the weekends or any day you have time. But these three breakfasts ANYONE can fit into their schedule; they’re hyper kid friendly and they’ll power you through till lunch – or at least until mid-morning snack-time!

No excuses – Break that fast EVERY morning!


My Go-To Meals, Part 1 – Sumac Baked Potato Salad

IMG_4049


This recipe is originally from a Nigella Lawson cookbook, ‘Forever Summer’ I think, and it’s remarkably healthy, considering her penchant for adding huge dollops of butter and cream to, er, every damn thing.

She calls it ‘Baked Potato Salad,’ but it doesn’t really feel like a salad to me. Maybe because I never have the patience to let it fully cool before devouring it. You can eat it cold, or if impatient like me, warm.

How easy is it to throw jacket potatoes in the oven? And the rest takes about 10 minutes tops.

It’s great for kids because it’s tasty, but not too refined or acquired a taste for them to pull a face.

It’s also a great casual supper to share with friends, lots of whom might not have heard of sumac before (I certainly hadn’t till I discovered this recipe!) so you have a great ice breaker/talking point right there to start the evening off.

In case you haven’t come across it before, sumac (pronounced IMG_4047soo-mack) is a red berry that is ground into a powder, and used in Middle Eastern cooking. It tastes lemony, but it’s not as tart as lemon; it’s slightly sweeter and has a fuller, rounder flavour. You know what? You just gotta taste it. It goes darn well with baked potatoes, that’s for sure.

What you need:

  • 2 baked potatoes
  • 4 tablespoons of extra virgin olive oil
  • juice of half a lemon
  • 1 teaspoon of sumac (or enough to lightly sprinkle the surface of your dish)
  • 1 teaspoon of cumin (or enough to lightly sprinkle the surface of your dish)
  • 2 spring onions, sliced
  • sea salt
  • chopped fresh parsley (optional)

Add an extra potato per person, but don’t worry if this isn’t exact – you’ll probably want to serve it with something else anyway, so there’ll be plenty.

What you do:

When the baked potatoes are cool enough to work with, roughly mush and chop them up, and spread them out in your serving dish. Please don’t be neat. This is a very rustic kind of a meal – no airs and graces here. Nigella actually says to scoop out the potato flesh and not to mind if a little bit of skin comes with it. However, I just chop it all up, skins and all – are you kidding me? The skins are an amazing source of iron, calcium, fibre, B vitamins and potassium – and they’re yummy and add great texture!

When you’ve done this, drizzle your olive oil all over potatoes.

Then the same with the lemon juice.

Salt evenly all over, to taste.

Sprinkle sumac and cumin evenly all over.

Sprinkle chopped spring onions (and parsley, if using) all over.

Leave a few minutes for the flavours to sink in.

Consume with gusto.


Q. What can you eat sumac baked potatoes with?

A. Anything.

Some suggestions:

-veggie sausages

-steamed kale

-Ful Madammas (I’ll have to post my recipe for this soon)

-corn on the cob

-steamed asparagus

-a Mediterranean (or really, any) salad


Killer Sides, Part 1 – Easy Sweet Potato Fries

These are just one of my favourite foods EVER. So simple and so, so tasty, and if baked (yes, pedants, I know they’re called fries, but in my book it’s the fry size that makes them fries, not the cooking method) then they’re not that blinking bad for you either.

I discovered them on one of our trips to the US a few years ago, and my first thought on trying them was ‘why would anyone ever make a fry out of potato when you can make them out of sweet potato and they taste like THIS?’

They were unheard of in the UK a few years ago, but word is slowly but surely crossing that big pond, and they are now becoming more and more widely available on restaurant/cafe menus here.

There are lots of different ways to make them. One thing’s for damn sure, I’ve never had a bad one.

They are great deep fried, but they are honestly just as delicious this way. The most time-consuming thing is chopping and slicing the sweet potatoes, but once you’ve done that, you’ve nearly done. I’d say overall prep time is around 25 minutes.

You will need:

– A couple of big sweet potatoes, or three smaller ones

– Spraying oil (I prefer sunflower for this purpose)

– 1 1/2 teaspoons garlic powder

– 1 1/2 teaspoons paprika

– Salt

– Baking tray

– Greaseproof paper


What you do:

– Pre-heat the oven to 200 degrees.

– Chop and slice the sweet potatoes into skinny, fry size lengths. If you have one of those fancy gadgets that does this, good for you. If not, get slicing! Don’t worry in the least if your fries are all different sizes, they are kind of meant to look a bit rough and ready. Just try to keep them skinny, around .5 of a centimetre thick.

IMG_3791


– Line your baking tray with greaseproof paper, and lay out your fries as best you can.

– Spray your fries liberally. I find it’s better spraying oil than drizzling it from a bottle. It’s quite hard to gauge how much drizzles out and you can end up with your fries swimming in oil when you come to turn them.

IMG_3794


– Mix the garlic powder and paprika in a small bowl.

IMG_3805IMG_3808


– Sprinkle this mixture evenly all over your fries.

– Salt your fries thoroughly. Don’t be shy.

– They should now look something like this.

IMG_3813


– Place in oven and bake for approx 20 minutes, turning them after 10. Take them out when they start to brown.

– This is how I accompanied this batch:

IMG_3829A


Sweet potato fries are a great side to, oooooooooh, ANYTHING, and amazing just as a snack on their own. You don’t even need to dip them in ketchup they are so delicious naked (of course you can if you need to). Need a crowd pleaser? Got kids/in-laws/friends coming over? They’ll love you forever for making these. Show me someone who doesn’t adore them and I’ll show you a big fat liar!


Tahini Sauce – A Quick And Easy Recipe

I’ve been making this tahini sauce for years. It’s probably most well-known as an accompaniment to falafel, but it’s also yummy as a salad dressing, great on baked potatoes, you can mix it up with falafel and/or salad and stick it in a pita pocket, or you can just plain ol’ dip into it with a pita soldier or a rice cracker.

Tahini is basically ground sesame seeds. Sesame seeds are a fabulous source of calcium. You don’t need the milk from the cow when the seed of the sesame is around. They are also an excellent way to get your copper, manganese, magnesium, iron, zinc, selenium, phosphorus, and vitamin B1 needs met!

Try and get the paler tahini. Some might say the darker one is better as the seeds are unhulled; but the paler one made with hulled seeds is just easier to work with for this sauce. The dark one can taste a bit bitter.

You can find tahini pretty much anywhere these days, even supermarkets. If you can, I’d try and get it from a local Asian/Middle Eastern grocers. Some of the tahini I’ve bought in health stores is a bit heavy. The real thing made in the countries that use it the most, seems to be best. It’s not expensive at around £2.50 for 454g (1lb). This is really economical as you only use a small bit for each batch, so it lasts a good while.                    IMG_3721

My favourite tahini is the Al-Nakhil brand. It’s Lebanese and has a gorgeous, creamy, smooth texture. I’m sure there are lots of other great Middle Eastern brands. Look around.


What you’ll need:

– 3 tblspns Tahini

– water

– juice of 1/2 a lemon

– soy sauce (just use salt if you don’t tolerate soy)

– the tiniest drop of olive oil EVER

– 1/2 tspn garlic powder

– 3/4 tspn of cumin

– 3/4 tspn of paprika

IMG_3716


What you do:

I’ve given specific amounts of each ingredient above, but tahini is really made to taste, so do feel free to add more or less of each ingredient to suit you. The only important thing is getting the right salt taste to lemon ratio, but you will identify this when you taste it.

If you’re making it for the first time, and just for a couple of people, I’d start with three tablespoons of tahini, and put them in a cereal bowl (one that has quite high sides if possible).

Then fill a jug with water (filtered, preferably) to put next to you.

Pour a little of the water into the bowl, so it comes approximately 1cm over the top of your tahini. Then grab a teaspoon and stir rapidly. If it is too thick, pour in some more water, and stir again. Continue to do this, until it is almost the consistency of milkshake.

PRETTY IMPORTANT NOTE: At the beginning of the stirring process, the mixture WILL curdle and look disgusting, but don’t worry, it all comes back together again and looks creamy and dreamy after just a little more stirring.

Got the creamy milky texture back?

Good.

– Add a tiny touch (really tiny) of olive oil, and stir it in. This just helps keep the texture smooth.

Now to flavour your tahini sauce.

Firstly, add a drop (maybe 1/2 tspn) of soy sauce to salt your tahini. Just keep adding half teaspoons and tasting it until you are happy.

Then add lemon juice. I’d start with the juice of half a lemon, and increase it if you need more. You want it pretty zingy, to complement the salt taste.

When you are happy with the lemon/salt taste ratio (your tahini should already be tasting pretty darn good btw), add a 1/2 teaspoon of garlic powder, or more if you love garlic, and stir it in.

Check your consistency is good. At this stage you want it to be the consistency of milk. Don’t worry if it is a little bit thicker. You just don’t want it too thick, as it will thicken as it stands. If it is too thick, just keep adding a little water, making sure not to dilute your flavours by adding a little more of each, if needed, until you get a thinner liquid.

Sprinkle 3/4 of a teaspoon of ground cumin, and 3/4 teaspoon of paprika over the top, and leave to stand for around 15 minutes for the flavours to mingle.

It will last in the fridge a couple of days, and you will need to give it a quick stir each time you use it again.

IMG_3744

Simple Avocado And Tofu Maki Rolls

It took me a while to stop missing sushi – it really did.

I was such a sushi lover, that while I was very happy and confident in my decision to quit eating fish, I thought I’d always secretly yearn for it.

One of the things that got me over this was discovering I could make sushi myself, and that the main taste that I craved was really the mix of the soy, wasabi, rice and nori. With an avocado filling for that creamy texture, or tofu for a more chewy texture – you have all the ingredients for that satisfying sushi hit right there. No need to kill the fishkies, or OD on mercury.

Also, I use brown rice. They’ve been doing this in California for a gazillion years. It tastes great in maki rolls, better than white rice in my opinion. If you can get more nutrients, with a great (I think better) taste to boot, then why the hell not?

This recipe is pretty easy, the only slightly difficult part is the rolling, but if cack-handed me can do it – so can you!  Don’t even worry if your rolls aren’t too pretty at first, you’ll get the hang of it – and pretty or not, they all taste the same!

You will need:

-1 sushi rolling mat

– 1 cup long-grain brown rice

– drizzle of brown rice vinegar

– drizzle of sesame oil

– half teaspoon of salt

– 1 pack Nori seaweed

– 1 ripe Haas avocado

– 1 block firm tofu

– 2 tspns olive/sunflower oil (for the tofu)

– 4 or 5 spring onions

To be served with:

– soy sauce

– wasabi paste

IMG_3384


What you do:

-Boil the rice as per the instructions on the packet, and then boil for 4 or 5 minutes more. As it’s not the usual glutinous rice used for sushi, you want it to be very slightly overcooked, so it’s a bit stickier than it would be otherwise.

-While your rice is on the boil, drain your tofu and cut it into strips. On a small baking tray or pie tin, pour approximately 1 tablespoon of olive or sunflower oil, and into the oil pour the same amount of soy sauce. Mix it around, and place your tofu strips on the tray, turning them in the mixture so they are all coated.

IMG_3388


Put this under the grill (broiler, US peeps!), for around 10 minutes each side, or to taste – a bit longer if you prefer your tofu chewier. When it’s done, just take it out and let it cool.

– When your rice is done, drain and rinse it, and put it in a mixing bowl. Drizzle sesame oil over it (roughly 1 tablespoon), and do the same with your brown rice vinegar, but around 1 1/2 teaspoons. Then salt it conservatively. You don’t need to salt it too much because you’re going to be dipping it in soy sauce while eating it, which will provide most of the salt taste you need. Mix it all up, then taste rice to check you can taste a tiny bit of everything, then leave to cool.

– Prep your filling ingredients. Slice the avocado, slice the spring onions into strips, and put on a board or plate along with the tofu you grilled earlier. Keep them right next to where you’ll be rolling your sushi, for easy access.

IMG_3393


-Place your sushi mat on a chopping board, and a sheet of Nori vertically on top of it,

IMG_3396


-Put approximately two dessert spoons of your rice mixture on to the Nori, and press it down into a rectangle in the bottom centre of the sheet, leaving around two centimetres at the bottom and sides. Pack it down tight, as much as you can, like so:

IMG_3398


– Place an avocado or tofu strip in the middle of your rice rectangle, running horizontally, and put a few strips of spring onion alongside making sure you have spread them to the edges of your rice rectangle.

IMG_3404

IMG_3413


You are now ready to roll, hurrah!

Take the mat and roll it (away from you) over the top of your filling, like so;

IMG_3406


Then push the top of the nori under your filling – making sure not to push the mat under too, and continue rolling the nori up using the mat.

IMG_3407

IMG_3408


When you’ve rolled the nori almost up to the end, you can moisten the top edge with water (just use your finger) to help it stick together well. In case my explanation isn’t too clear – this very short little vid demonstrates it nicely. Roll it up completely and put the mat all the way around it and squidge it a bit, and hold it for a few seconds just to secure it.

IMG_3409

IMG_3412


Then unroll your mat and voila! A maki roll ready for slicing.

IMG_3429


Slice the roll with a sharp serrated knife into 3 cm (or 1 in) rounds. When I slice it, if the ends aren’t pretty – I just eat them as I go along!  The rest present on a serving platter.

IMG_3435

IMG_3422


You should have enough rice to do this 5 or 6 times.  When you’re done, you can sprinkle the rolls with sesame seeds, or furikake.

Mix the wasabi according to instructions on the tin (if not pre-made) and serve your rolls with this and soy sauce.

Of course you can use whatever you want as filling – julienned cucumber and carrots, daikon, sprouted seeds, baby asparagus, rolled up spinach leaves, a mix of all/some of these. The possibilities and permutations are endless.

So you see, a plant-based diet does NOT mean giving up that great sushi taste, not by a long shot. Get rolling! DO IT.

Killer Snacks, Part 3: Fried Plantain

Once you discover fried plantain, you won’t understand how it hasn’t always been a part of your life. You may even wonder why you ever bothered with chips or fries.

Not seen plantain before? They are those things that look exactly like bananas, but a bit bigger, and the skin is more angular.

It’s very easy to mistake them for bananas.

I did this once, years ago while living in Paris. For breakfast, I used to grab two bananas every day from a grocer, on my way to work. This particular day I accidentally grabbed two plantain – I was probably  thinking ‘ Yay, bigger bananas.’

If you bite into a raw plantain however, you very quickly realise it’s not a banana – they suck all the moisture out of your mouth, it’s VERY uncomfortable, trust me!

I learned what plantain was that day, but it was still a while before I tried them properly.

These days, living in south London, there are plenty of places for me to buy plantain. Even my local big name supermarket sells it. Look in your nearest Asian or Caribbean grocers.

At my local Sri Lankan grocers, I can buy 3 plantain for £1.20. This is, in truth, more than we need for two portions, but what can I say? My partner and I are plantain-a-philes. That is officially a thing now. Didn’t you know?

You can buy your plantain green (unripe), yellow, or black (over ripe). My preference is middle-of-the-road yellow; the green ones are a bit too dry for my taste, and the black ones a bit too sweet.  Experiment though! I had fried black plantain with hot creole sauce in New Orleans, and I loved it, but if I’m making it at home, I just find the yellow ones easier to work with. If you’re making it for the first time, definitely start with the yellow ones, then branch out!

You will need:

– 2 or 3 yellow plantain (1 per person generally speaking, and don’t worry if they have bits of black on them, that’s fine, you just don’t want them completely black, at least this time).

– Oil (I use sunflower, groundnut or coconut, as these are best for frying)

– Cajun seasoning (I use Slap Ya Mama , which can be ordered from here in the UK). Otherwise you can just use salt and garlic granules, it will still be delicious.

-1 frying pan

IMG_3355


What you do:

Slice your plantain(s) diagonally, with pieces around 1.5cm thick, like so:

IMG_3363


Heat your oil till it starts bubbling gently.

Place your plantain in the pan (gently, to avoid painful splashbacks!). You can cover the bottom of the pan with the plantain, but don’t let pieces overlap.

IMG_3365


Sprinkle your seasoning fairly liberally all over.

IMG_3367


Fry for 8 mins, or until golden brown, then turn plantain with a spatula, season the other side, and do the same.

IMG_3371


Lay a piece of kitchen roll on a plate, and transfer plantain pieces onto it. The kitchen roll will soak up any excess oil.

IMG_3375


Use the same oil to repeat the process if you have any plantain left over, but reduce the seasoning because there will be some left in the oil from last time.

Enjoy your fried plantain! They are delicious on their own or dipped in ketchup (go easy though, ketchup is full of sugar – I’m on the lookout for a sugar-free ketchup right now, I’ll report back when I find one).


Killer Snacks, Part 2: Cinnamon Grapefruit

This recipe is so easy, I feel slightly ridiculous posting it. The only reason I am is because up until a couple of years ago, I didn’t know you could put cinnamon on grapefruit, and that it was delicious. I can’t remember how I found out about it, but I’m pretty sure it was from a blog. So, I’m hoping this reaches anyone who has still yet to discover this tantalising snack. Of course, it could always be a dessert, or part of a breakfast too.


You will need:

-1 fresh pink grapefruit (don’t worry if you only have white, that works too), cut in half horizontally

-ground cinnamon

IMG_3339


What you do:

Use small serrated knife to separate sections, and cut them away from their skins. Then cut round between the segments and the outer peel of the grapefruit.

IMG_3332


Sprinkle cinnamon all over to taste.

IMG_3334


Grab teaspoon and dig in!


Note: You can also make baked cinnamon grapefruit. Simply preheat oven to 350 degrees, and once you’ve ‘cinnamoned’ your grapefruit half, place it cut side up on a baking sheet, and bake for 10-15 minutes. I have tried this once, and it was delicious, but it’s so yummy as it is, I can never be bothered turning the oven on.

If you need a bit more sweetness, or just fancy a more decadent treat, pour on a touch of agave nectar or brown rice syrup before sprinkling on the cinnamon.


Super Simple Kimchi Recipe – It Practically Makes Itself!

Following on from last weeks tips for great gut health, I’m going to show you how I make my own simple and tasty kimchi.

Fermented foods like kimchi and sauerkraut are fantastic for the gut because of the rich source of probiotics and digestive enzymes they contain. Ideally, a little would be eaten every day, but a few times a week is good.

My kimchi is riDICulously easy, and though I’m sure kimchi purists would have something to say about it, it is yummy, healthy, vegan, and doesn’t take too much time or effort out of your busy day.

You will need:

-1 mason jar, here’s a pic of mine:-IMG_3292

-1 napa cabbage (Chinese leaf)

-salt

-1 long pointed red pepper

-3 big cloves or 6 small cloves garlic

-1/4 onion

-1 knob of ginger, around 3 cm (1 in) thick

-4/6 spring onions, sliced width-wise

-1 small mild to medium red chilli (optional)

The amounts of garlic, onion, ginger; and spring onions can all be adapted to taste. Try it this way first, then you can always make it to suit your own taste next time if desired.


What you do:

Wash the outer leaves of the cabbage (if not organic), and pat dry. Put the cabbage horizontally in front of you and chop the root end off (you can compost this or feed it to the rabbit!)

IMG_3278


Then slice it, with each slice around 4-5 cm (2 in) thick.

IMG_3280


IMG_3282


Then take a handful of the chopped cabbage, and lay it over the bottom of a cake mixing bowl or pyrex dish and sprinkle 3/4 teaspoon of salt all over it.

IMG_3286


Then take another handful of the chopped cabbage, layer it on top of the first, and sprinkle 3/4 teaspoon of salt over that layer. Repeat until there is no more cabbage left.

Put the lid on (or cover with a plate) and stick it somewhere darkish, and room temperature or cool, for eight hours.

IMG_3289


Wait eight hours….tum ti tum….la la la….

…go get your salty cabbage! You will see that during this time, the cabbage has absorbed the salt, shrunk down into the bowl, and there will be lots of salty liquid at the bottom of the bowl. This is good.

Blitz the red pepper, ginger, garlic, onion, and chilli (if you’re using it) in a blender until it looks like a smoothie.

IMG_3294


IMG_3300


Pour this over the cabbage. Put the sliced spring onions on top.

IMG_3303


Mix it all together – salad tongs are really helpful for this, but you can use a fork or spoon.

IMG_3308


When all the cabbage is nicely coated in the red mixture, and the spring onions are spread throughout, it’s time to put it in the jar (again, salad tongs make this easy, but use whatever).

You can keep pushing the cabbage down in the jar, to make room for it all. Get as much in as you can, and make sure there is enough liquid in there. When you’ve filled the jar to the top, push the cabbage down once more, and the liquid should just come over the top of the veg.

IMG_3310


Seal the jar. It’s advisable, while the kimchi is fermenting and doing its thang, that you keep it in a bowl like this…

IMG_3320

….Because it can get a bit frisky and leak out the top.

Store it in the same place you stored the salted cabbage.

Wait 48 hours….la di da di dum….

Done that? Yay! Now you can open your kimchi and sample it.

Please note: At first it may taste quite mild, and as the days/weeks go by it will get stronger. I prefer it strong, but you may be different! It lasts in the fridge for weeks, but at some point it will get too strong to eat. 3-4 weeks is probably a good life for your jar of kimchi – if it lasts that long!

You can eat it solo as a quick snack, in a sandwich, or on toast. You can make a kimchi stew with it, but my FAVOURITE way to enjoy kimchi is this: Warm a wholewheat pitta pocket in a toaster, then cut it open one side and put a scraping of Pure, Earthbalance (or any vegan spread) inside it, along with some sliced, cold, leftover vegan sausages. I particularly favour Vbites sage and marjoram sausages. Cover the sausage with kimchi, close pocket and devour. This.Snack.Will.Change.Your.Life.

Killer Snacks, Part 1: Avocado Toast

Hungry? Need a killer snack? Something quick but classy? That’s nutritious, tasty and satisfying, despite it only taking five minutes (or less!) to throw together?

Well then, do this. You’ll not be sorry.

You will need:

– A slice (or two) of good quality whole wheat, spelt, or gluten-free bread

– One nice, ripe Hass avocado

– Soy sauce, or salt

And here are the (oh so complicated!) instructions:

– Toast bread

– De-stone avocado, scoop out inside of avocado and put it in a bowl

– Mush up the avocado in the bowl

– Plonk (yes, it is a technical term, shutup) avocado onto the toast.

– Add drops of soy sauce, or sprinkle salt all over for flavour.

You now have Avocado Toast. And you’re welcome.

If you want to get fancy, you can add chopped spring onions, ground black pepper, lemon juice, chilli sauce, sesame seeds. Anything really.

Here’s mine. And no. I don’t share.


IMG_3271